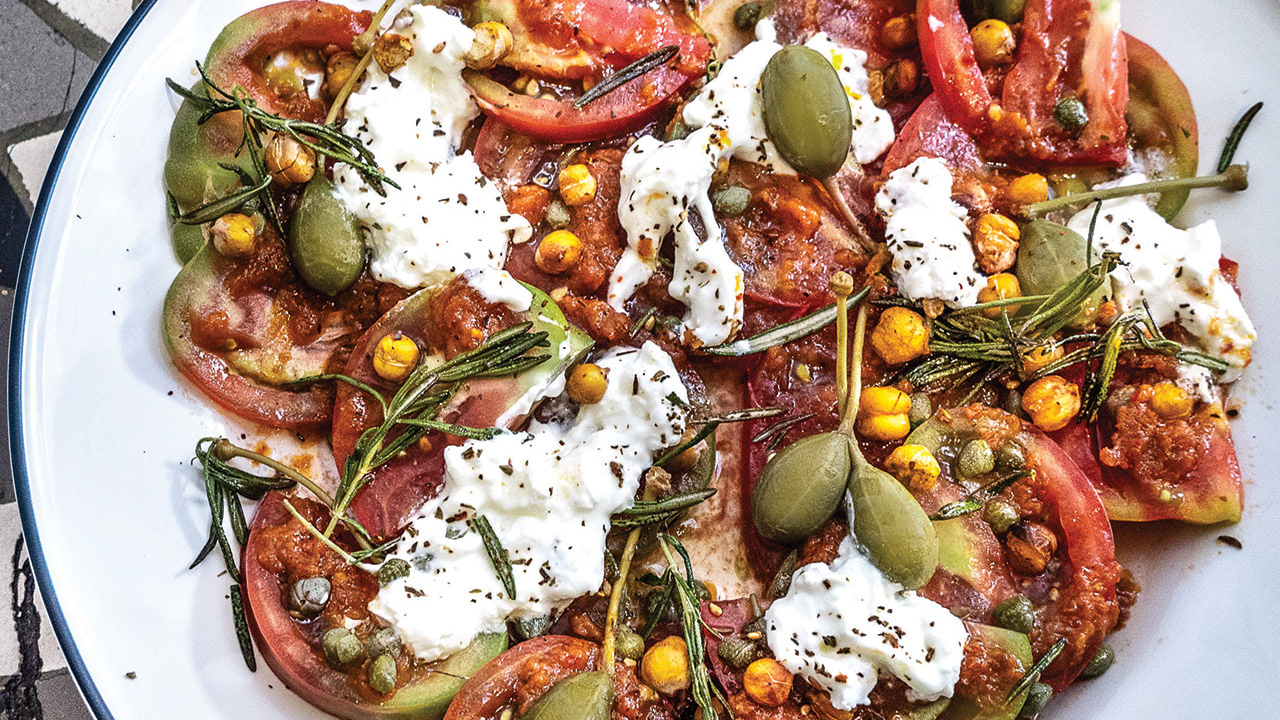
PHOTO: Whitecap Books; Wild Fried Chicken, pictured left, from The Canadian Craft Beer Cookbook by David Ort.
Laura Brehaut/Postmedia News
Originally published on January 31, 2014; canada.com
Originally published on January 31, 2014; canada.com
PUBLISHED IN PRINT:
Ottawa Citizen: April 24, 2014; page D4
The Province (Vancouver): February 16, 2014; page C2
Calgary Herald: February 15, 2014; page G13
The Windsor Star: February 5, 2014; page C3
Ottawa Citizen: April 24, 2014; page D4
The Province (Vancouver): February 16, 2014; page C2
Calgary Herald: February 15, 2014; page G13
The Windsor Star: February 5, 2014; page C3
Wine and cheese? According to food writer and beer aficionado David Ort, beer and cheese is so much better. Wine and chocolate? It’s beer again. “A dark, roasted stout or porter goes much better with chocolate than any wine could,” Ort says in an interview in Toronto. It’s the variety and flexibility behind craft beers that he believes increases the potential for connecting with food.
Whether at the table or on the plate, Ort highlights the diversity and variety of craft beer in The Canadian Craft Beer Cookbook (Whitecap Books, 2013). While beer batters, brownies and traditional dishes such as Welsh rarebit and Belgian carbonade flamande are widely accepted culinary uses for beer, Ort takes it further with the more than 75 recipes in the book, including Beer Fondue, No-Knead Soft Pretzels and Pickled Hop Shoots.
Craft beer from across Canada is featured in each of the recipes, either as an ingredient, pairing suggestion or both. Ort designed the recipes for specific styles of beer, rather than brands, and he often includes an international beer recommendation as well as a Canadian one. By nature, craft beer is often produced on a local- and small-scale, so depending on the province you live in, you’ll have different craft beers at your disposal.
“I just wish that beer was more transportable across Canada. But in some ways that’s what craft beer is about. It’s about local connections with people that care about their product, care how their product tastes,” Ort says. “It was a challenge writing the book; getting the total coverage but also maintaining that idea that local is important and it’s worth connecting with.”
To demonstrate the Canadian craft beer landscape, Ort includes profiles of several major players, including Spinnakers Gastro Brewpub in Victoria, Nicole Barry – CEO of Half Pints Brewing Company in Winnipeg – and Mirella Amato – Master Cicerone and owner of Beerology in Toronto. “Mirella is arguably the number one beer educator in Canada; one of the most recognized in North America,” Ort says. “Nicole Barry opened the only craft brewery, more or less, in Manitoba and has seen line-ups out the door whenever they do a special release. And Spinnakers was the first brewpub in Canada; they’re a great marker of where craft beer has been in Canada.”
There are several recipes aimed at the home brewer – namely Oatmeal Raisin Cookies with Spent Barley, Granola with Spent Grain, Pickled Hop Shoots, and Hop Shoots with Warm Burrata and Prosciutto. Ort freely admits that spent grain and hop shoots are ingredients that not everyone will be able to access. But if you brew your own beer, you’ll likely have more than your fair share, and for those who don’t… what are you waiting for? Make friends with a craft brewer.
TIPS FOR COOKING WITH BEER
Beware bitterness: When the liquid in a dish reduces as you cook, the beer’s level of bitterness will become more concentrated. Ort suggests using beer with an IBU (International Bitterness Units) value of 20 or below for reductions, and generally speaking, staying away from beers with values between 20 and 40 IBUs.
Size matters: “Realize that when you pour beer into a hot pan, it will foam up a lot more than it would in a glass so always err on the side of bigger pan or pot.”
Style over brand: “If you’re working from a recipe that calls for a specific beer; don’t sweat the specific beer – pay attention to the style.”
Would you drink it?: “One thing that beer cooks borrow from wine cooks is don’t cook with a beer you wouldn’t drink. So unless you’re making vinegar, the beer that’s leftover from Friday night is not good for cooking on Saturday.”
Temperature matters: “If you’re using beer to leaven batter – carbonation makes batters lighter – you want it to be as cold as possible. For onion rings, fried chicken or any other recipes that use beer in that way, put it in the fridge for a good while, or even in the freezer for 15 or 20 minutes.”
Recipes excerpted from The Canadian Craft Beer Cookbook by David Ort (Whitecap Books, 2013).
PORTER GINGERBREAD
Recommended beer: Porter
Coffee Porter, Mill Street Brewery (Ontario)
Recommended beer: Porter
Coffee Porter, Mill Street Brewery (Ontario)
3/4 cup (185 mL) porter
1/2 tsp (2.5 mL) baking soda
2/3 cup (160 mL) fancy molasses
4 oz (120 g) dark brown sugar, firmly packed (about 1/2 cup/125 mL)
1/2 cup (125 mL) granulated sugar
6 1/2 oz (195 g) flour (about 1 1/2 cups/375 mL)
2 tsp (10 mL) ground ginger
1 scant tsp (5 mL) kosher salt
1/2 tsp (2.5 mL) ground cinnamon
1/2 tsp (2.5 mL) baking powder
2 eggs
1/3 cup (80 mL) vegetable oil
1. Heat your oven to 350°F (175°C); set a rack in the middle position. Prepare an 8-inch (20 cm) square cake pan by buttering and flouring its sides.
2. Set a medium saucepan over medium heat and pour in the porter. Bring to a boil and remove from the heat. Stir in the baking soda. After the science-project volcano foaming settles down, stir in the molasses and both the sugars.
3. In a large mixing bowl, whisk together the flour, ground ginger, kosher salt, cinnamon and baking powder.
4. Transfer the porter-molasses mixture to a 4-cup (1 L) measure or medium mixing bowl. Whisk in the eggs and oil until thoroughly combined. Pour a third of the wet ingredients into the dry and whisk vigorously. Repeat with the other two-thirds, in two separate additions. This is not a recipe where you need to worry about creating gluten by overmixing. Whisk vigorously.
5. Pour the batter into the prepared pan, using a wide spatula to encourage stragglers. Bake the gingerbread for 35 to 40 minutes or until a cake tester, inserted in the centre, comes out mostly clean. Cool the cake in the pan on a wire rack for at least an hour, then slice into 2-inch (5 cm) squares.
serves 6 (makes: 8-inch (20 cm) square pan; cuts into 16 squares)
Note: All dry spices stay fresh longer if purchased as whole seeds or pods. That isn’t an option with dried ginger—particularly problematic because of how wan stale dried ginger tastes—so it’s important to replenish your supply regularly. I find it’s best to buy from bulk stores in small quantities.
RISOTTO WITH RED CABBAGE, BACON AND APPLES
Recommended beer: Strong Belgian ale
Dernière Volonté, Microbrasserie Dieu du Ciel! (Quebec)
La Caracole Nostradamus, Brasserie La Caracole (Belgium)
Recommended beer: Strong Belgian ale
Dernière Volonté, Microbrasserie Dieu du Ciel! (Quebec)
La Caracole Nostradamus, Brasserie La Caracole (Belgium)
3 2/3 cups (900 mL) chicken broth
2 bay leaves
3 sprigs thyme, chopped
3 pieces bacon, cut in chunks
1 yellow cooking onion, finely diced
1 large cooking apple, peeled, cored and diced
10 oz (300 g) arborio rice
kosher salt
3/4 cup (185 mL) Belgian ale
1/2 head red cabbage, cored and shredded
2 cloves garlic, smashed and minced
3 tbsp (45 mL) unsalted butter
4 oz (125 g) grated Parmesan (about 1 cup/250 mL)
freshly ground black pepper
1. Heat your oven to 400°F (200°C); set a rack in the second-lowest position.
2. In a medium saucepan, bring the chicken broth, bay leaves and thyme to a simmer over medium heat.
3. Heat a Dutch oven over medium heat. Add the bacon pieces and cook, stirring occasionally, until the bacon is somewhat crisp and has rendered most of its fat. Remove the bacon and save it for later. If there is more than about a tablespoon (15 mL) of fat, pour off the excess.
4. Reduce the heat to medium-low and add the onion and apple to the pan. Sweat, stirring to coat in bacon fat, until they are soft and the onions are somewhat translucent, about 7 to 8 minutes. Increase the heat to medium and add the rice with a pinch of kosher salt. Toast for 3 to 4 minutes until the rice is fragrant. Pour in the beer and scrape the bottom of the Dutch oven with a straight-edged wooden spoon to loosen any brown bits. Add the cabbage and garlic to the pan and stir to mix evenly. Pour the simmering broth through a sieve (to remove the herbs) into the Dutch oven. Cover tightly with the lid and move the Dutch oven to the oven to bake for 18 minutes.
5. After 18 minutes, open the oven and remove the lid. If most of the liquid has been absorbed, remove the pot from the oven. If not, replace lid and continue to cook for 2 to 3 more minutes. Stir in the butter, Parmesan, pepper to taste and reserved bacon, and let stand for a minute to melt the butter before serving.
serves 4–5
Note: If you want your cabbage to be particularly soft and entirely without a hint of crunch, blanch it in boiling water for 2 to 3 minutes at the start of the process.
PUMPKIN ALE MUSTARD
Recommended beer: Pumpkin ale
Pumpkineater, Howe Sound Brewing (British Columbia)
Recommended beer: Pumpkin ale
Pumpkineater, Howe Sound Brewing (British Columbia)
a scant 1/2 cup (125 mL) mustard seeds
1/2 cup (125 mL) pumpkin ale
4 tsp (20 mL) vinegar (your own beer vinegar is best, but cider or white vinegars are fine substitutes)
1 Tbsp (15 mL) maple syrup
1/2 tsp (2.5 mL) kosher salt
1/2 cup (125 mL) pumpkin ale
4 tsp (20 mL) vinegar (your own beer vinegar is best, but cider or white vinegars are fine substitutes)
1 Tbsp (15 mL) maple syrup
1/2 tsp (2.5 mL) kosher salt
1. Soak the mustard seeds in the pumpkin ale for at least 4 hours or up to overnight.
2. Reserve a quarter of the soaked mustard seeds. In a mini food processor or blender, combine the other three-quarters of the soaked mustard seeds with the vinegar, maple syrup and salt. Blend for 1 minute or until most of the seeds have lost their individual texture. Fold the reserved seeds into the mustard.
3. Pack into a scrupulously clean Mason jar, seal tightly and store in the refrigerator. The mustard is ready to use right away, but will only get better with a few days to rest, and should last for at least 4 to 6 weeks.
makes 1 cup (250 mL)

